


Please be sure to check out Gillian's Blog The other guest designer for this week's technique.
Two other sites to check out:
1. The man responsible for giving us Distress & Grunge Tim Holtz
2. The best Yahoo discussion group founded by the best list mom ever Gloria, All Things Tim

Note: Please do not feel you need to run out and buy all kinds of supplies for this technique. Use the colors of Distress Stickles that you have on hand.
And now on to my project for this challenge:
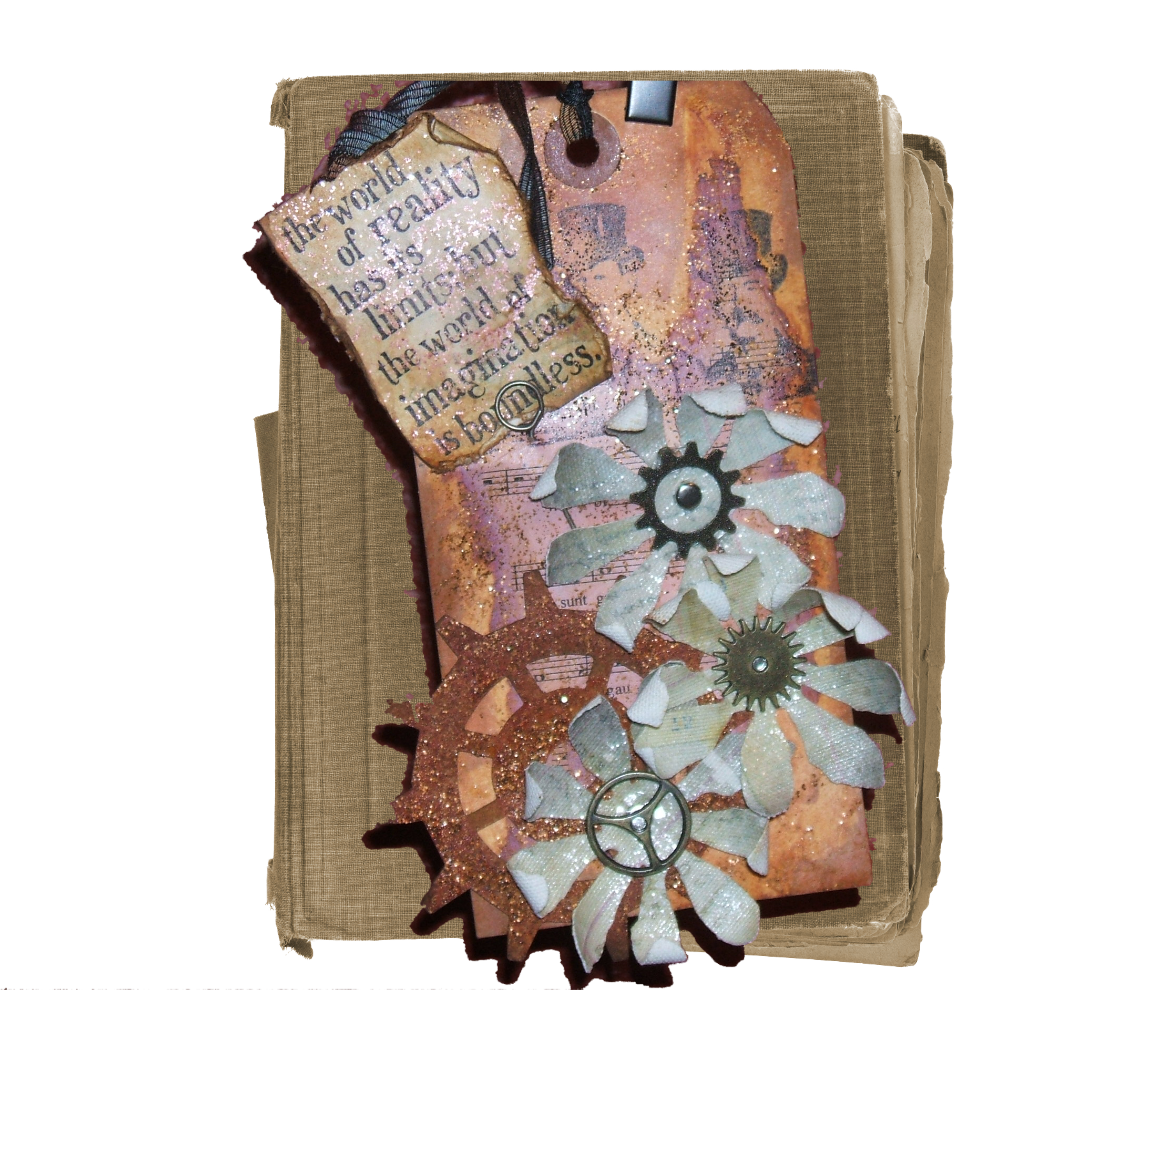
And here are the steps to create this project:

Step 1) Cover your tag completely with a glue stick. Cover glue with sheet music or dictionary page. Heat tag with heat gun. Let cool. Pull off page. Portions of the page will remain. A tattered torn page is the look you want.

Step 2) Ink tag with your choice of Distress Ink. I used Victorian Velvet, Rusty Hinge, & Vintage Photo.

Step 3) Draw a “W” on the tag with Distress Stickles. I used Tea Dye.

Step 4) With your finger spread out the “W” of Distress Stickles. This will remove some of the Distress ink as the glue will act as a resist. Set tag aside and let dry. If you are impatient you may use a heat gun to speed up the drying, or on these hot days you may use a personal fan to speed up the drying of the Distress Stickles.

Step 5) Ink Grunge and spread Distress Stickles. I used Rusty Hinge Distress Ink and Tea Dye Distress Stickles. Let dry.

Step 6) Once grunge is dry blend on a darker shade of Distress Ink (yes you can ink over the Distress Stickles). Spritz with water as Distress Ink reacts with water. I used Walnut Stain Distress Ink.
Have fun and get a little inky!

Jason
Creative Scrapping Guy
For the flowers I did a Sticky Back Canvas Transfer using Multi Medium, and used Rock Candy Distress stickles.
For those of you that do want to purchase supplies, there are many great places to purchase from I encourage you to take a look at my new online scrapbook supply store:


What a fantastic tag! I love all the layers you created and those flowers are to die for!
ReplyDeleteAwesome tag! Love what you've done with the flowers and gear. Off to try mine...
ReplyDeleteFantastic tag, thanks for the step by step.
ReplyDeleteWho knew cogs would look so good stickled!! Love it.
Fantastic to share this weeks GM GD spot with you, love those stickled cogs along with my fav Steampunk Gents!
ReplyDeleteJason, this is an awesome piece and a fabulous tutorial. Thank you SO much for being such a fantastic guest designer-- it's wonderful to have you back in blog land!
ReplyDeleteReally cool tag - love the way you used the Stickles! Here's my drying tip: I left mine on the dash of my car, lol! Worked great! ;-)
ReplyDeleteCongrats on your GD spot Jason! Your tag is awesome!
ReplyDeleteLove those 'steam-punk' flowers.
ReplyDeleteTFS and for the inspiration!
KimMJ
bast830@comcast.net
Wonderful steampunk feeling. Fabulous tag.
ReplyDelete